| Scanning Acoustic Microscope for the measurement of Coating thickness and its uniformity |
| Function Summary |
| Based on the principle of ultrasonic testing, using high frequency focused ultrasound probe, the Scanning Acoustic Microscope can be used to detect cracks, delamination, voids, bubble, porosity and other defects in the surface, sub-surface and internal of opaque objects. |
| The self-development Scanning Acoustic Microscope is completely developed by Center for Nondestructive Testing and Control, Beijing Institute of Technology. It can be applied in failure analysis of semiconductor, electronic packaging, circuit board welding, material texture observation, biomedical and other fields of non-destructive testing and observation. |
 |
| SAM system |
| Technical features |
| Scanning axis adopting linear motor closed-loop control, High precision, High scanning speed |
| Full-wave acquisition and storage, realizing image observation at any depth |
| Different imaging methods, including Peak imaging, TOF imaging, Frequency domain imaging, etc., realizing observation and analysis of a variety of physical properties. |
| Gate following function, realizing real-time following scanning of the workpiece top surface |
| Specifications |
| Scanning range:350×300mm |
| Minimum distance between sample points of the scan axis: 8μm |
| Maximum scanning speed:1500mm/s |
| Travel distance of the focusing axis: 150mm |
| Maximum sampling frequency:4GHz |
| Frequency range:10 - 400MHz |
| Technical principle |
| Ultrasonic waves, vertically incident on the coating, reflect several times between the top surface and the bottom surface of the coating. Using the Welch method to analyze the power spectrum of n times reflection echoes, the corresponding frequency is related to the thickness of the coating. Collecting the corresponding frequencies of the two adjacent extremum and then substituting them and the sound velocity into the following equation, the coating thickness can be obtained. |
 |
| Applications |
| The following Figure shows the thickness measurement principle by using a 20M ultrasound transducer to measure the thickness of a 345mm thermal barrier coating. |
 |
coating time-domain signals
(a) time-domain signal (including top surface reflection) (b) n times reflect waves (c) Welch power spectrum
|
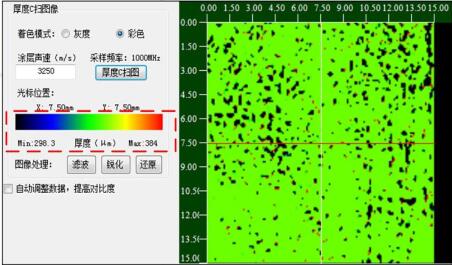
| It can be calculated through the equation that the tested thickness is 330mm, and this result shows high precision. Based on the SAM C-scan, combining Welch power spectrum thickness measurement methods, a coating thickness distribution measuring scanning method is developed and the C-scan image of the coating thickness distribution can be obtained. |
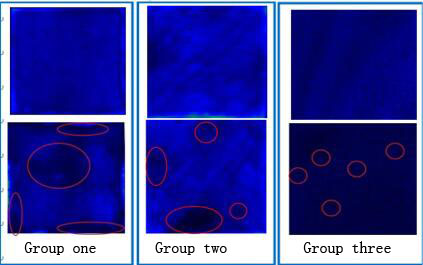
| When there are defects in the coating interface, the amplitude of the bottom echo Be will Be far less than that of a bonding zone with good quality. Thus, the coating defects can be detected.The following Figure shows the C-scan images of intact samples and defected samples, where the red areas indicates defects. |
 |
| C-scan image of the coating thickness |
 |
| C-scan image of the samples |
| |

