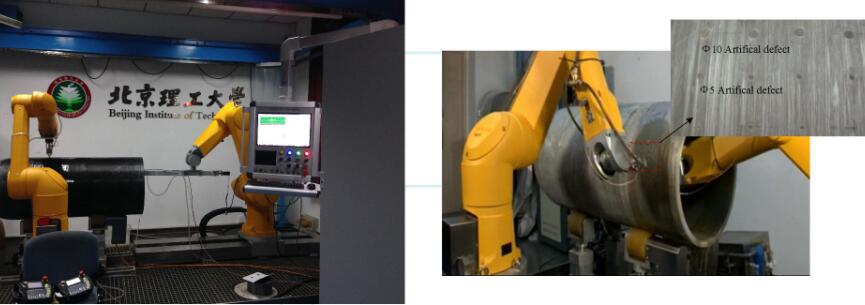
| Twin-robot Ultrasonic NDT System for Testing Composites |
| Function Summary |
Twin-robot NDT system for testing composites based on the principle of ultrasonic detection can detect internal defects of layered composites, such as delamination, pore, inclusion and debond. It can also detect characteristics of composite materials like porosity, elastic modulus, residual stress and density distributions. |
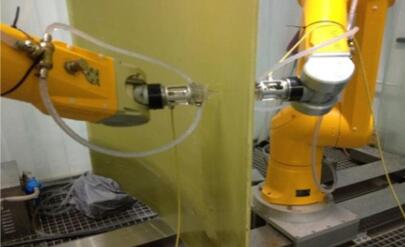
| The system using space precision localization technology can realize testing arbitrary surface profile composites with ultrasonic water-squirting technology. It can not only realize twin-robot synchronous transmission testing, but also single robot pulse reflection testing. With fast detection speed, high precision, good flexibility, the system can be used for testing large curved surface composites in aerospace, shipbuilding, automobile industry and other fields. |
| Technical features |
| High precision, fast testing speed, good flexibility |
| Full wave data acquisition and storage, realize arbitrary depth imaging observation |
| Peak imaging, achieve variety of physical characteristics observation and analysis |
| Visual and fast display internal defects of large composites |
 |
| Rotary Component Test System |
 |
 |
| Example of Large Open Surface |
Complex closed component detection system |
| Specifications |
The Maximum Size: 1500×1500mm
The Minimum Distance Between Scan Sampling Points: 0.1 mm
The Maximum Scan Speed: 20 mm/s
The Highest Sampling Frequency: 250 MHz
Frequency Range: 0.5 to 10 MHz
The Maximum Test Thickness: 30 mm |
| Technical principle |
| Twin-robot NDT system contains mechanical unit, hardware unit and software unit. The two robots should drive the transducers to adjust their position and orientation timely when the profile curvature of composite parts is changing. It must be ensured that the transmitting and receiving transducer is in the same axis. The transmitting and receiving probe should always point to the surface normal of the testing composites in order to accomplish precise control of the testing probe. |
| There are two methods of testing path generating and planning for curved surface. One is automatic detection mode and the other is teaching mode. If the CAD model data of measuring curved parts is known, we can generate the detection scanning path automatically from CAD design drawings. If the CAD model data of measuring curved parts is unknown, the teaching mode is used to generate the scanning path. Software unit control the high-speed data acquisition card to collect ultrasonic signals of the testing points, and accomplish real-time image. |
| Applications |
| 1. Quality inspection for rotary components, such as high speed axis of rotation, high pressure vessel, etc. |
| 2. Quality inspection for large equipment, such as large composite components of aircraft and spacecraft, engines, generator spindle, high pressure vessel, ultra-thick sheet, rod, etc. |
| 3. Quality inspection for composite materials with complex shape profile, such as aircraft parts, in the field of aerospace, automotive, Marine, chemical industry and so on. The detection for complex curved surface of the composite components can make us get defects, the large amount of information of damage, such as the location of the defect distribution, shape and size, etc. |
| |

